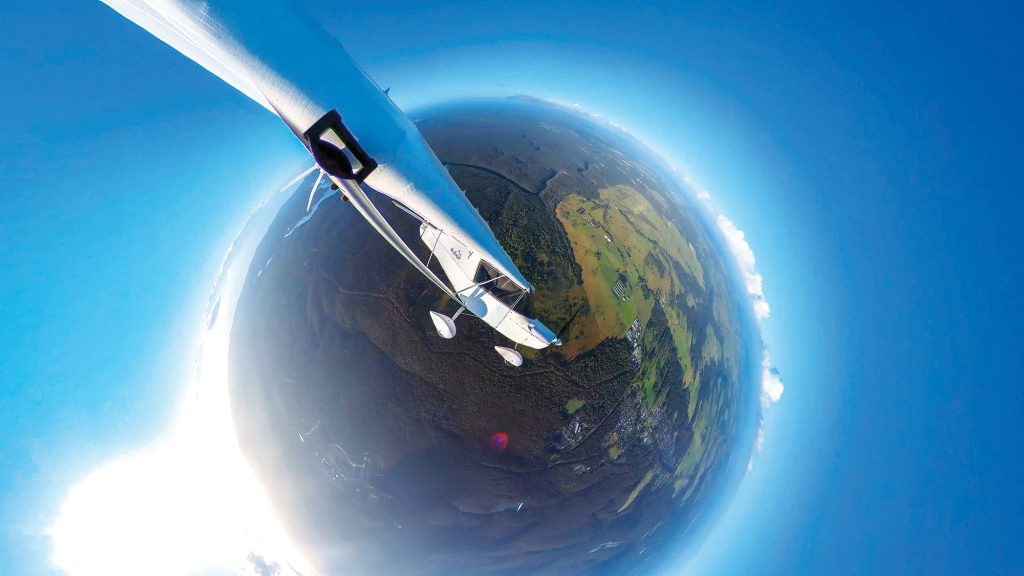
SO YOU WANT TO SET UP YOUR PLANE TO RECORD YOUR FLIGHTS BUT NOT SURE WHERE TO START…
THE RULES
If you are temporarily affixing a camera to the outside of your aircraft there are easy ways to do this, although the process does differ depending on the category of aircraft that you own.
If you’re operating a Light Sport Aircraft under a 24 or 23 registration, you’ll need a Letter of Authority (LOA) from the Light Sport Manufacturer in order to mount a camera to the exterior of your aircraft. To do this, email your manufacturer with information about what you are wanting to do. They will then send you through a Letter of Authority (LOA) if they are satisfied with the changes you are doing. A lot of manufacturers already have a list of approved mounting options, so it’s worth finding out if this exists for your aircraft and starting here.
If you have an LSA with an experimental certificate or amateur built aircraft (10 and 19 registration) then you can get sign-off from an L1 to make sure that the modifications are appropriate.
MARAP PROCESS
For almost all situations, you should be able to avoid the need to make changes that are drastic and permanent enough that you need to get MARAP approval. The sort of changes that would require you to go down this avenue include adding wiring through a wing or adding a boom arm out the front of your wing for a 360° camera. In most cases, especially if you’re just starting out, you won’t need to worry about it.
If you are unsure of what the rules are for your aircraft, I highly recommend getting in touch with RAAus directly and just asking the question. Speaking from personal experience, I can say that they are incredibly helpful in explaining the rules and the easiest way to achieve the mission.
LET’S TALK MOUNTS
Repeat after me, “thou shall not use suction mounts on the outside of an aircraft”.
Although you will see people online overseas doing this and posting online, it is just a bad idea. Suction mounts are based around a vacuum under the suction cup which is where the trouble lays. Once you account for the change in temperature, air pressure changes from altitude and a change in surface temperatures from being in the sun, well, you can see how the suction could become weak. But it doesn’t stop there. That small GoPro camera has got several kilograms of backwards force from drag. Long story short, you need to keep all mounts safe and secure. Suction cups are just not reliable for this.
There is a wide variety of options but here are a few of my favourites. The reason I like them is that they are strong, built to last and uncomplicated.
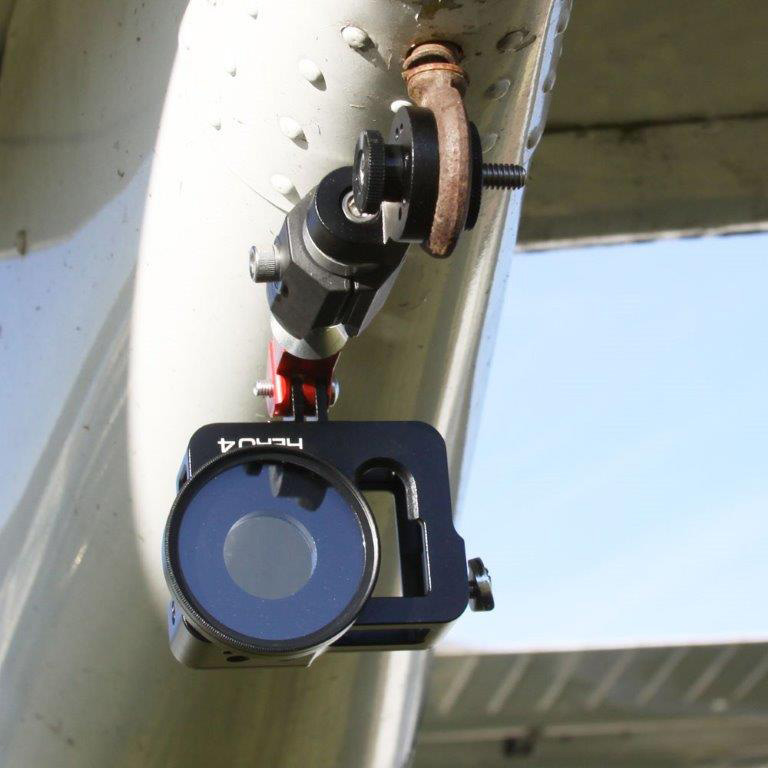
Strut mount:
These mounts are fantastic for high wing aircraft. They are simple to attach and being attached to the wing strut means they are a long way away from the wing and their ability to disturb airflow. The other great thing is that the camera angle is in a fantastic location for filming as you can simply adjust the swivel to point back towards the cockpit or just look straight ahead with an uninterrupted view of the scenery without a canopy window warping the shot.
Tiedown mount:
These are fantastic for low wing aircraft and for planes that don’t have a strut to attach anything to. Tiedown mounts are simple to check and easy to take on and off, not to mention that being mounted to a tiedown point, by design, will be easily able to take the load of any drag from the camera on the wing.
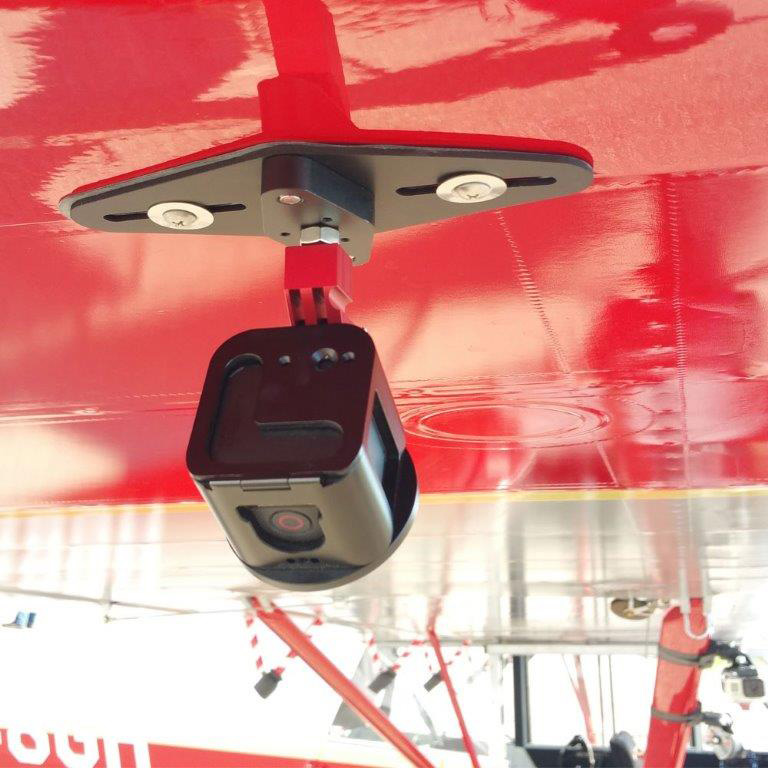
Plate mount:
These are usually added to an inspection port on a wing. Where you have an inspection plate, you can take out a few screws and use slightly longer ones that also hold in a thin, lightweight mount. Once the plate is installed, you have an easy mount to screw on and off whenever you need.
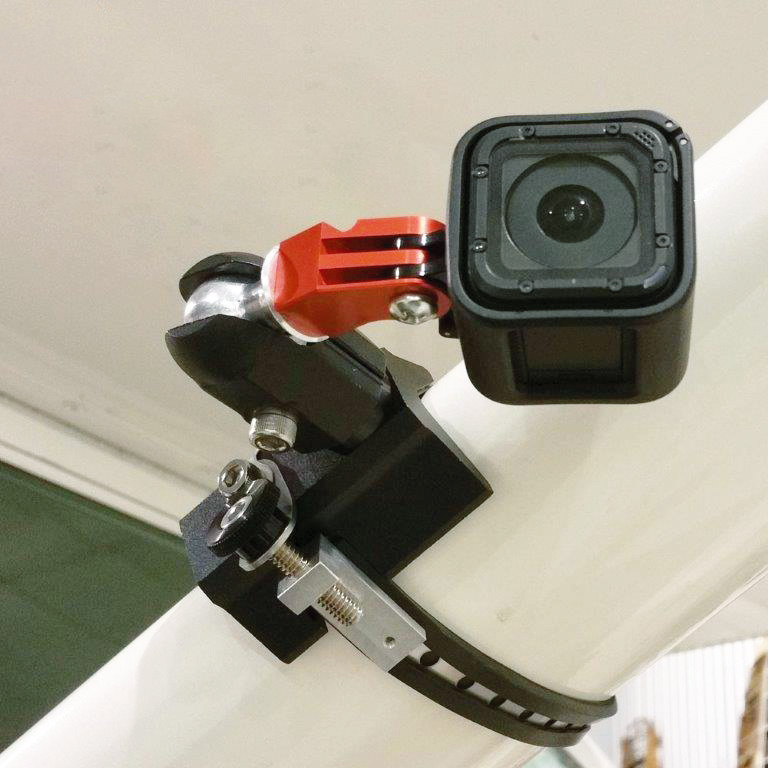
If you are talking about inside the plane, then you have a lot more options as you don’t have to worry about aerofoils and the effects of drag. For most cockpits, when you start to look around you will find metal tubes everywhere which is great for attaching a clamp mount to.
If you really get stuck, you are allowed to use suction mounts inside the cockpit but they need to have a lanyard as well. In terms of the rules for this, you need to make sure that you have a secured load as you would do with anything else.
There are a few companies out there that specialise in this sort of thing. FlightFlix is a popular supplier based out of the USA. They have even created mounts used by the US Air Force’s Blue Angels. If they can make them hold tight to an F-18 Hornet, then I am sure they will be more than capable for most RAAus planes. Another common brand that you will come across is Nflightcam. They make more than just mounts but also adaptors and a lot of different camera accessories specifically for aviation. I highly recommend sticking with trusted brands that produce mounts specifically for aviation as they are built for purpose and the cost difference is marginal.
CAMERA OPTIONS
For outside of the cockpit, you need a lightweight, small (low drag), high quality camera which cuts down the range of choices significantly. Personally, I really love the ever-reliable GoPro Hero action camera. We have even put our money where our mouth is and are operating 3 Hero 10’s as part of the editorial team at SportPilot.
Here are some of the points that stood out to me as both a pilot and camera enthusiast:
- 4K and even 5.3K footage at 60 frames a second
- Image stabilisation that is truly amazing giving a great clean shot in bumpy conditions
- Battery life of about 1.5 hours at full resolution
- Endless amounts of parts and additional compatible equipment online
- Horizon Lock which will lock the image to the horizon so if you are doing small light turns it will keep the image dead flat.
- Ability to control the camera remotely from your phone while in the cockpit, swapping from footage to high resolution still images and back again with a few taps.
360° CAMERAS
For those that have already been recording some awesome footage and would like to take it up a notch, try having a look at 360° cameras, such as the ‘Insta360 One’. These cameras will record in all directions continuously, which allows you to use a single camera for shooting footage in front of the plane and looking back at the plane. It does require some work with video editing software after recording, so it is not for the faint of heart. However, having the ability to be able to pan a shot around from the tip of a wing is really impressive to watch and worth the effort.
ADDITIONAL CONTENDERS
Although fairly new to the action camera market, DJI (who created a name for themselves in the drone market) produce fantastic camera equipment and are a company to keep your eye on for future action camera releases. Their action camera range is still playing catchup, but at their current pace I wouldn’t be surprised to see them giving GoPro a run for their money in future releases.
Power:
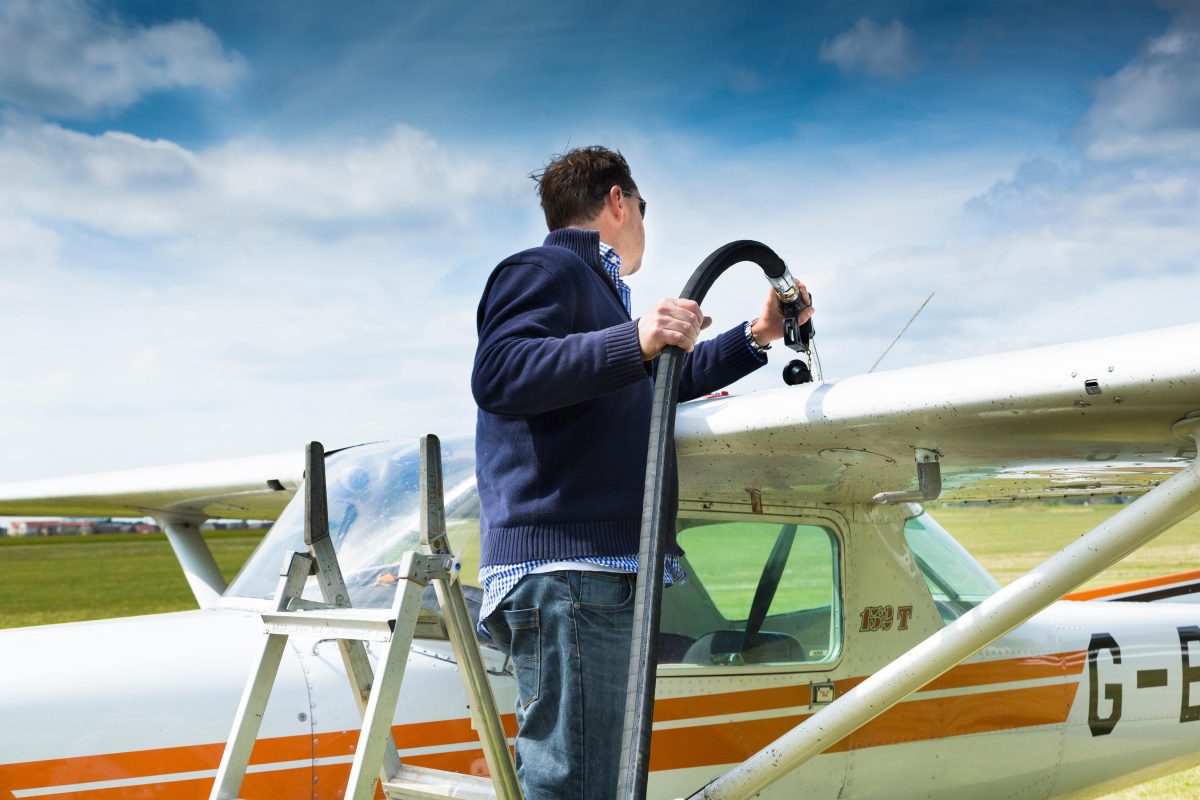
For cameras on the inside the plane it is best to set up a method for charging in-use, as this will give you longer recording time. The first way to do this is the same way that you charge your tablet or phone while in flight. Get yourself a USB charger from a cigarette lighter charging socket and then plug that straight into your camera. This way you can record an entire flight end to end without ever having to juggle batteries. Depending where your camera is mounted, it can sometimes be hard to get access to power. For this situation, a good quality USB battery bank will get you out of trouble and is also a good backup for charging any other devices while on the move. It also has the added benefit of being usable when the plane is turned off and you are still at the airport.
IS YOUR USB CHARGER SLOW?
If you have a USB charger that connects to a cigarette lighter socket, check to see if the USB Adaptor has ‘Fast Charging’. For most modern devices you will be able to charge your tablet much faster than the original USB chargers even though the plug looks the same.
HOW MANY DO I NEED?
My advice for anyone wanting to get setup is to start with one and go from there. Just from filming one flight, you will learn a huge amount and begin to figure out what you do and don’t like. Camera gear, like most things, can become unnecessarily complicated quickly so start small, keep it simple and tweak as you go!